
Every summer we visit Lake Michigan and the boys are always finding fossils and other rocks. If you make the Kaisercraft Advent Calendar I recommend you visit the Merly Impressions Blog HERE as the instructions on the Kaisercraft site were not helpful or detailed. I painted the box with acrylic paint and allowed it to dry. I used the assembly instructions found in the tutorial at the link above. For the drawer boxes you can find a list of all the beautiful Robin's Nest papers and embellishments at the bottom of this post.
Using The Robin's Nest Glitter Sea Shore paper I created the background for the inside square in the box. I trimmed off the glittered print at the bottom and trimmed the plain teal portion at the top, so that it measured 8 1/2" wide to fit through my printer. It is so trendy right now to have text and book like backgrounds on your pages. So, I found an image on the internet for free of the Great Lakes and printed it onto the top portion of the Glitter Sea Shorepaper. Be sure to make a test print on scrap paper first if you use this technique!
To make the title I used the Word Art in Microsoft Word. Here's how:
1) Open Microsoft Word and an empty document
2) Click on the Insert Tab at the Top of the screen.
3) Click on the Word Art Icon on the right hand sideChose the Word Art you want to use by clic
king on it. I wanted a word that was wider at the beginning and end of the word and narrow in the middle.
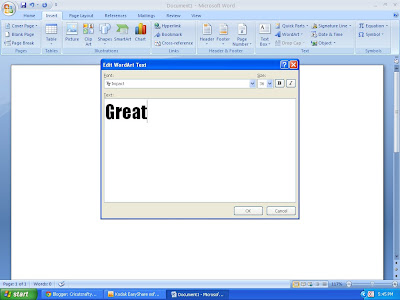
4) Chose the font you want and type your Text in the dialog box that appears and click OK
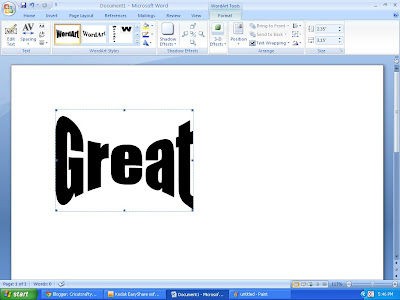
Above is how mine looked.
5) Drag to resize as desired
6) Print out this file if you have NO digital software that works with a cutter, for those of you with a cutter, skip to step 8
7) Temporarily adhere your printout to the paper you want to use in the center of the box and hand cut
8) If you have a cutter with digital software such as SCAL, Make the The Cutter or other, Hit the Print Screen button.
9) Open Paint software
10) Paste your screen print into the new paint document and save as a JPG image
11) Open your digitial cutter software and covert the JPG to the format used my your digital cutter. For SCAL2, this is click on the File menu and click Trace Image. Click Browse and select the photo you saved in step 10. Now you have your title! For the cursive font that says "Lakes" and "Finds" I used the Opposites Attract Cricut Cartridge and my Cricut DS software to weld the letters.
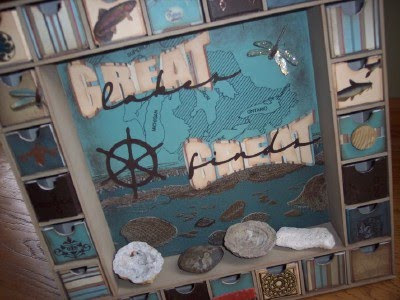
This box is great because you can place the bigger rocks on the shelf as pictured and limit your kids to smaller rocks to fit in the drawers. The Robin's Nest papers were perfect for a masculine box that even a Mom could love for her home decor!
Supplies Used
The Robin's Nest Glitter Sea Shore Paper (center of box)
The Robin's Nest Glitter Sea Shore Paper (center of box)
The Robin's Nest Calamity Jane Stripe (Stripe mat for title & on drawers)
The Robin's Nest Glitter Witch Accessories Paper (Chocolate Brown ships wheel, drawers & title)
The Robin's Nest Veranda Love/Stripe Paper
Making Memories Ribbon
Vintage button
Microsoft Word Software
SCAL or other cutting software (optional)
Ribbon (not sure as it has been in the stash for sooo long)
Art Glitter (on Dragonfly)
No comments:
Post a Comment